


The Cannabis Blooming Phase
PART 1 / INTRO
The end is almost in sight, and in just another couple of months of blossoming we will be ready to get our sheers out of the cupboard. In order to get the very best out of each plant we need to tune all the possible factors and harmonise them with each other.
After all, it often the tiniest improvements that lead to the most enormous results. This issue I will look at each of the important factors in turn, as well as how you can quickly remedy a nutrient deficiency.
Blossoming is well and truly underway and after a couple of weeks white hairs start to sprout on various parts of the plant. The formation of the buds is now slowly but surely underway. As I have said before, do not forget to separate the male from the female plants. The males that develop will soon start to develop little balls that within about three weeks will be ready to burst and spread pollen all over the place, fertilising the hairy females. The first three weeks of the blossoming period is in actual fact a sort of growth period.
After setting your plants into bloom by putting the lighting on a 12 hours' light / 12 hours' dark time scheme, the plants will start to bloom (grow) explosively; they can very quickly double or triple in size. Especially if this is your first time growing it is a really wonderful sight to behold, watching that little sprog of a bush transforming into a strapping whopper with buds swelling bigger and bigger, whose THC-rich crystals begin to pile up in mounds. The specific odour of the plant develops more and more, leaving you barely able to wait to harvest some of those buds and get enjoying your first spliff of the new harvest.
PART 2 / GROWTH AND BLOOM FEED
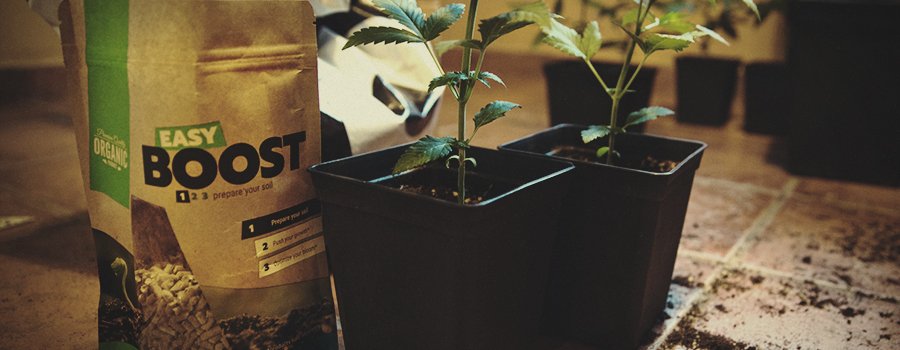
During the blooming period we will be switching over to using bloom feed and we can stash away any remaining growth nutrients until the next time, however little we have needed it to date.
If you have used well pre-fertilised soils, then you will easily have been able to go a few weeks without having had to use any liquid fertiliser. Naturally, your pregrowth period should not last too long, otherwise you will have to use growth nutrients.For this set-up we solely used Plagron nutrients; some brands use just a single bottle that you can use to make up both growth and bloom nutrient, while others make separate growth- and bloom-nutrients. Many growers also continue to give their plants growth nutrients into the first or second week of the blossoming period because this is a sort of transitional period and the plants still have a great thirst for nitrogen and other building blocks for their rapid development.
By doing this the plants will also end up somewhat bigger, given that the bloom feed stimulated the plants to switch their attention (and resources) more to bud formation than increasing their size. In this way, you can use your giving of nutrients to play around a bit with the eventual size of the plant. If you already have good-sized plants and would prefer that they remain a little compact due to constraints on the space you have available for them, then just give them bloom feed immediately.If your plants are on the small side and will not fill your space optimally at this rate and you want increase their size as much as possible, then you can continue to give them growth feed for a while longer to stimulate this.
Of course, these differences are not huge, but every little helps, and a few centimetres more here and there can make a nice difference. After three weeks' blossoming you will notice that the plants have reached their maximum size. The plants have stopped putting on any more height or girth and now they will be doing the real work of forming their buds. At this moment it is important to give them bloom feed, as the plants have a greater need of phosphorus and potassium.These are some of the most important building blocks for a good bud development.
This means it is a good ideas to also get your bottle of PK 13-14 out. PK 13-14 (I used Plagron's PK Plus) is a separate bloom feed used as a supplement to your regular bloom feed. As you might have surmised from the name, it contains extra phosphorus and potassium that your plant really needs to be able to reward you with big, fat buds.There are two ways of administering PK 13-14. You can start with small doses from the first week and then slowly build up the dose each week. So start with 0.25 ml / per litre in the first week and by the third week aim to be giving 0.75 ml / per litre.
How much you need to give is usually written on the side of the bottle too. The second way is to wait until the fourth week of bloom has begun, because it is this moment at which the most bud development begins, and then go straight to giving them 1.5 ml/per litre immediately and continue with this until the end of blooming.In short, using PK 13-14 makes for harder and denser buds by supplying the plant with a wealth of building materials.
Do not forget too that at this stage you must tailor your nutrient-giving to the needs of the plant. This has now developed very different nutritional requirements to when she needed lots of feeding for her strong development during the preceding three weeks. If you continue to give them as much nutrient as you have been doing, you run the risk of over-fertilising very quickly.If you had been giving them nutrients every day in the first few weeks, then maybe they only need them every other day now. It is something to pay attention to.
Every plant blooms in its own way, so some varieties have a very rapid increase in bud size between the third and fifth week of blooming, while other varieties put their real weight on as measured in grams in the last weeks. This means that you just have to look carefully at your plants (and listen to them) to know what their nutritional needs are at any PARTicular moment.I mention this because many beginner growers start off well and think that they have everything running smoothly, when after a few weeks the needs of the plant changes and the grower sticks to her old pattern, which can then result in him only managing a feeble harvest.
PART 3 / FEEDING THE LEAVES
The plants bloom enthusiastically and are fed with Algal Bloom. Every week they are sprayed with Phytamin Leaf Feed, and as a bloom stimulator, Plagron's Repro Forte is applied, which serves to ensure that more sugars are transported from the leaves to the buds.
Every two weeks enzymes are also given. These enzymes clean your medium by removing dead roots and reduce the salt accumulation that has occurred from the application of nutrients.
Seed plants have the tendency to grow in height earlier than clones. So by now they will be considerably larger and for that reason I strongly recommend if you have limited head room in your grow space that you 'top' or bend your plants. You bend a plant by pulling down the crown bud with string fixing it bent under slight tension. By doing this you get the same effect as topping (removing the top of the plant) but with the advantage of you getting to keep the crown bud.
The lowest- situated side branches will develop better and the plant will develop more buds, on a wider girth. Grow spaces that are lower than 1.5 metres in height will need their plants topping or bending earlier, or else given a much shorter growth period. Better too little food than too much, but if you should experience a severe nutrient deficiency that you cannot solve by recommencing with the bloom feed, then the quickest way of solving the problem is by applying leaf feed.
You make up some nutrient mix as you normally would and spray your plants with the solution. Plants can also take up nutrients via their leaves, and the advantage of doing it this way is that you do not change the pH of your medium. Spraying your plants is best done just before you turn off the lamps and / or just before you switch them on. The problem that presents itself when you get a large deficiency to deal with is that when you give the plants a nutrient solution (via the medium) you have to wait until the plants are thirsty again. There is no point in giving them a feed solution every day if the plants can't actually take up what they need. You're forced to wait a while, certainly longer than you would wish, before you can adjust the deficiency properly.
By combining watering with the application of leaf nutrient, then the plant gets what it needs immediately via the leaves. Generally, you will notice the improvement the very next day. You will observe that the yellow spots on the leaves will have regained some of their colour again. By continuing to give feed water and leaf nutrients, the plants will soon once again be a ravishing shade of green. Another advantage of leaf feeding is that you can safely experi ment to find out what kind of deficiency your plants have. Many growers are stricken by doubts as to whether they are dealing with an under-fertilisation or an excess.
By simply spraying the leaves with a feed solution you can very quickly observe if there is a positive or negative reaction from the plant and from that deduce what the problem is. Something that is always handy to have around is a set of bottles filled with individual nutrients such as nitrogen, phosphorus and potassium. With these you will be more easily able to experiment with your nutrient problem. Suppose you have a nitrogen deficiency and are forced to use a general nutrient solution to correct it; you are also giving the plant the elements that it does not need too.
Adopt the simple expedient of keeping a separate bottle with only nitrogen in it. Adding this will raise your plants nitrogen levels without influencing the other fertiliser components. This bottle system is especially useful for outdoor growers who are in the process of raising large plants in pots and needing to apply large volumes of nitrogen. PARTicularly during heat waves it is handy to spray your plants with a nitrogen solution, or simply increase the percentage of nitrogen in your general feed water. Obviously, the same process can be used for phosphorus and potassium deficiencies.
PART 4 / VENTILATION

In order to achieve a good bloom there must be sufficient carbon dioxide for the plants. They need CO2 for a vigorous growth and bloom during the daylight hours.
The more CO2 in the air the faster your plants can develop and the greater their tolerance for high temperatures. How you have your grow space set up is very important.
An optimal space is one in which all along one side, at the very bottom, holes have been bored to allow air in, while on the other side there is a vacuum extractor - placed as high up as possible. This set up offers an optimal air circulation from one side of the space to the other side. The CO2- rich air that enters flows over the plants, is used by them, then the CO2-depleted air is sucked out, drawing fresh air back in via the bottom-most holes. If growing in larger spaces and you are using a fan or air blower of some sort, this can be placed at the top of the space if you are also using an air- sock.
The air blower works in exactly the opposite way to a vacuum pump: rather than sucking air out, it blows air in. This is unnecessary when growing in small spaces, which have sufficient air renewal with a pump. An Air-Sock is a long sock made from textile, between 3-5 metres in length. If you just use an air blower then you are usually getting cold air pumped into one side of your space , which means the climate on this side is not at its optimal temperature. Nor is the CO2 spread evenly over the plants. The Sock works as follows: you fasten it on top of your air blower and fasten this to the ceiling.
Once the blower is switched on then the Air-Sock is filled with incoming air, which then enters the space 3 to 5 metres into your space. After that the CO2-rich air is evenly spread throughout the space, and the effect of this is that all your plants can better enjoy the fresh air, plus the cold outside air is given time to warm up, so the climate remains nearer to optimal. It is simple but effective. Having too little ventilation produces weaker growth and blooming, the plants can not develop well, and yellowing of the leaves can occur.
A rotating fan is another important piece of grow space equipment. This does not only ensure that you have good air circulation in your space which mixes the warm and cool layers of air together, but your plants also like a nice breeze. Thanks to the breeze your plants will develop nice thick stems, and they will mature into slightly smaller and more compact adults, and as you know by now, a thick stem determines to a large extent the eventual yield your plant will be able to produce. By and large, the plants with the thickest stems will also be the biggest yielders.
PART 5 / BUD FORMATION

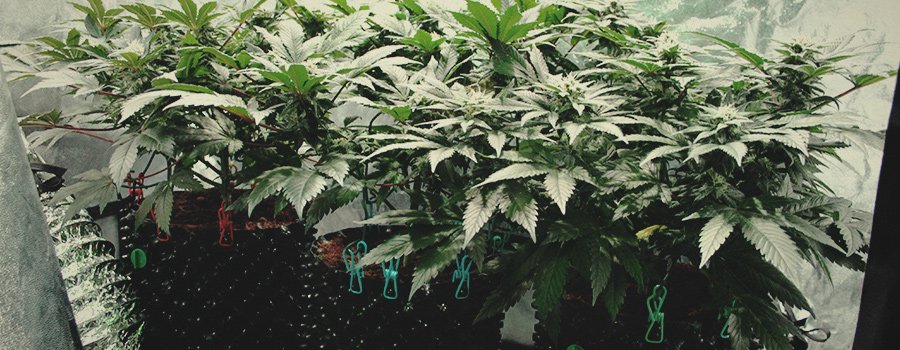
The most important weeks of the blossoming period are from the third to the fifth week of bloom for the majority of plants.
The most important weeks of the blossoming period are from the third to the fifth week of bloom for the majority of plants.
Given that now most plants will be devoting most of their energy to developing their buds, during these coming weeks they are going to increase very rapidly in size. So now is the time when you really have to make sure everything runs as smoothly as possible.
The beginning of the third week is also the last chance you have to spray your plants with an organic pesticide. The buds are not yet hard and compact. It can be a good idea to spray them now preventatively, rather than wait until the fifth week and find that your buds are now crawling with bugs, by which stage it is not advisable to spray. There's not much more to do than simply giving nutrients during this stage besides of course enjoying the sight of these gorgeous buds gradually appearing. More and more white hairs are being produced and slowly but surely separate small buds grow into each other to create one huge bud.